There are some places that just feel easy to be in.
Saundersfoot is one of those for me.
It’s a wonderful little coastal town on the south coast of Pembrokeshire, lively without being overwhelming, friendly without trying too hard. There’s a proper mix of accommodation, pubs, cafés and small shops, and it makes a brilliant base whether you’re coming for a family holiday or a few days with a camera. There's just so much variety packed into such a small stretch of coastline.
Walking East Towards Wiseman’s Bridge, Pembrokeshire
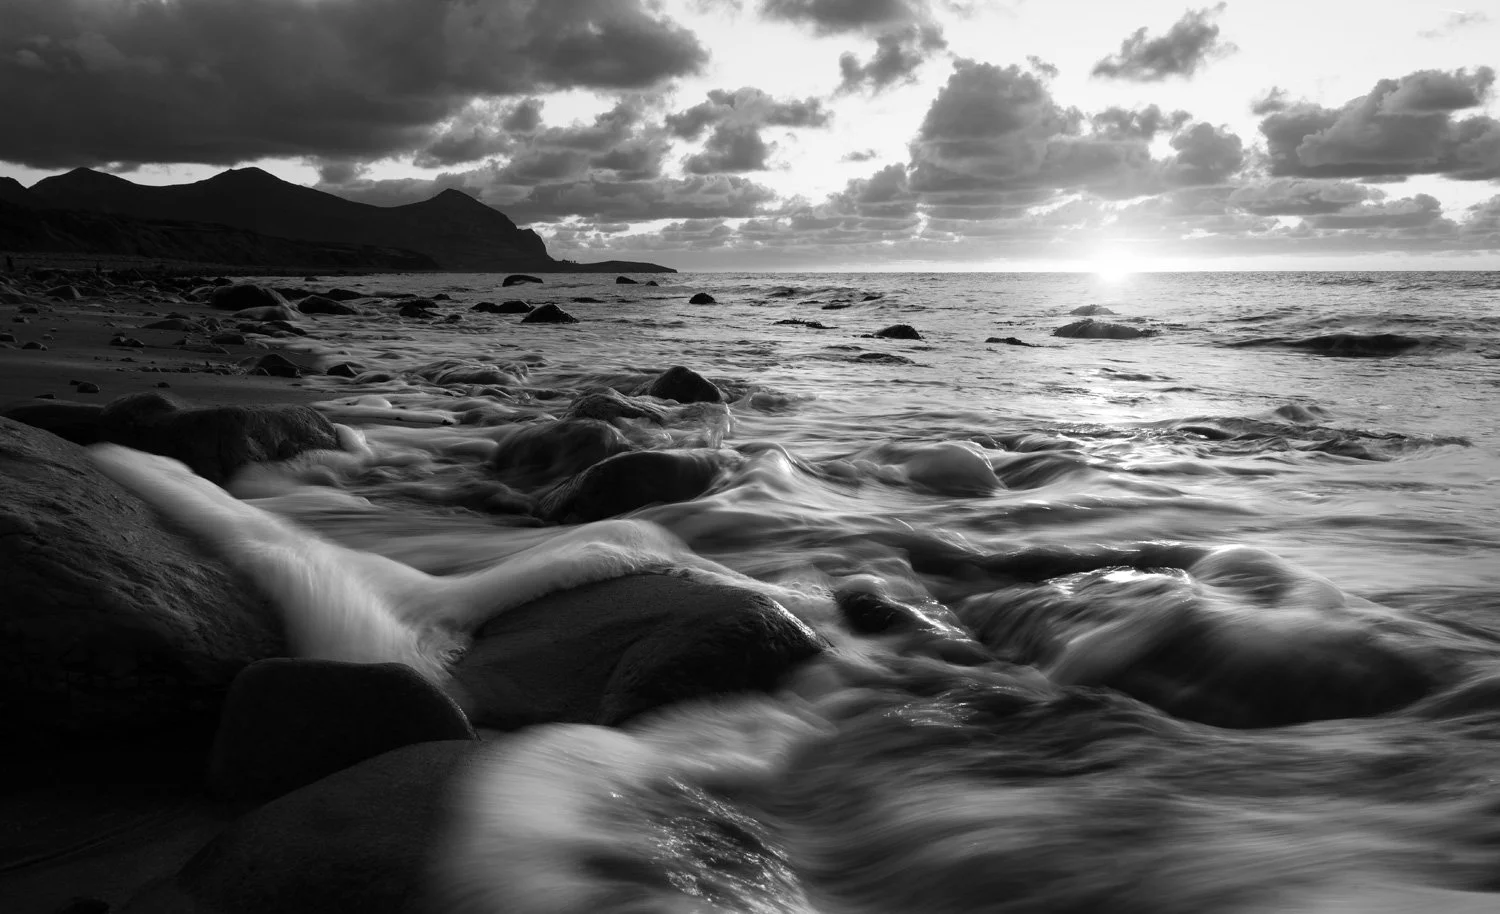
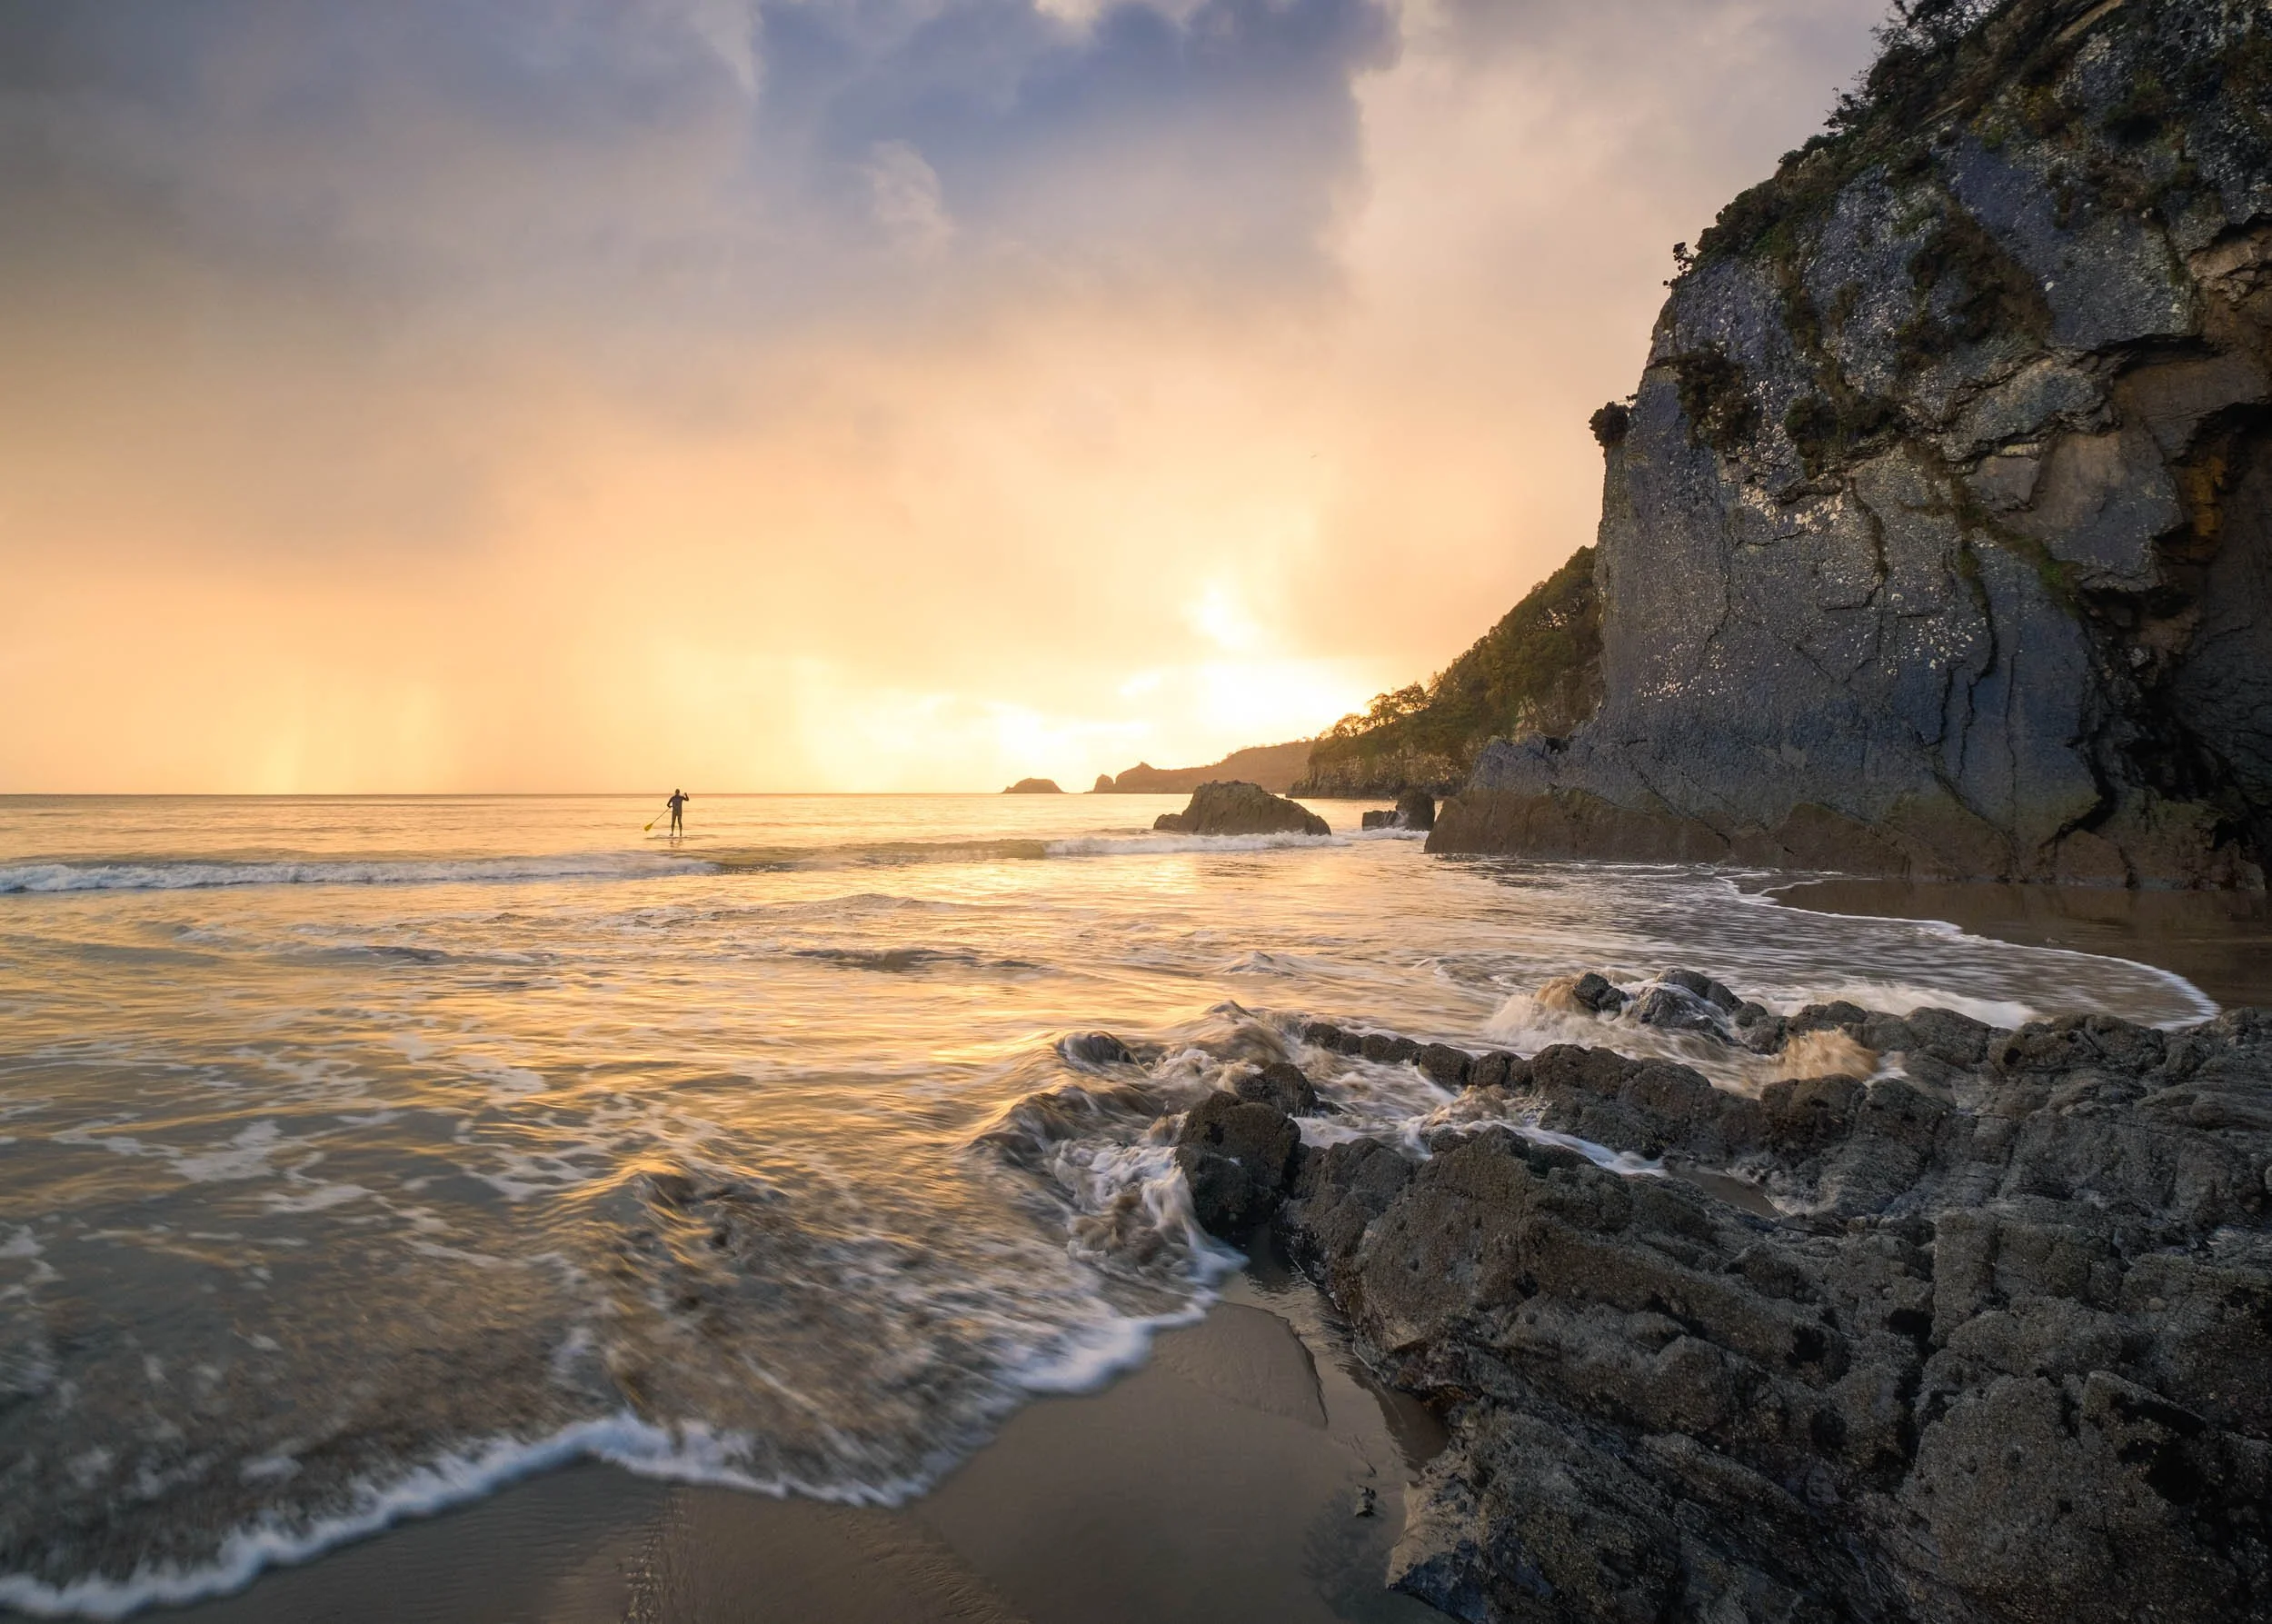
If you head east out of town, the coastal walk takes you towards Wiseman's Bridge, a small cove that really comes into its own at low tide. The rock formations there are full of character, folded, layered, worn down by years of tide and weather. It’s the sort of place where you can slow right down and spend half an hour working on one photo.
For years, one of the charms of that walk was passing through the old mining tunnels, dark, echoey, slightly damp underfoot. They always felt like little time portals between town and sea. A landslide over the top of the tunnels changed things for a while, and the route was diverted over the hillside instead. It’s a slightly longer way round, though the views from up there are lovely in their own right. I’ve heard work is ongoing to reopen the tunnels, which will make the coastal connection feel seamless again.
Even with the diversion, it’s a rewarding stretch of coast. I’ve photographed it in flat grey light and in golden evening glow, and both have worked in different ways. Sometimes the softness suits the textures of the rocks more than dramatic skies ever could.
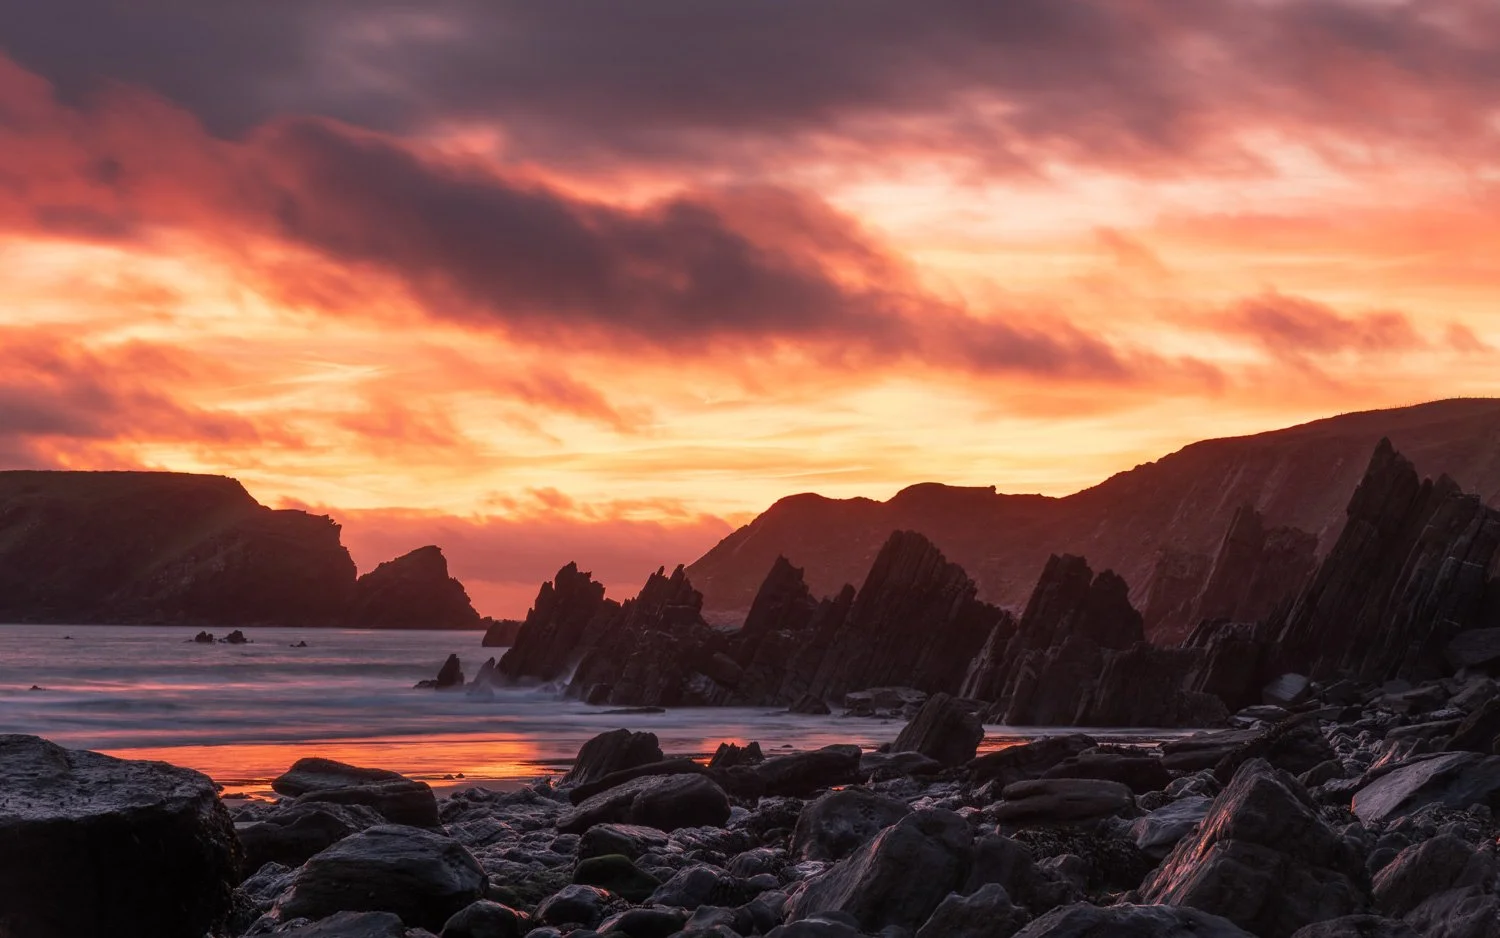
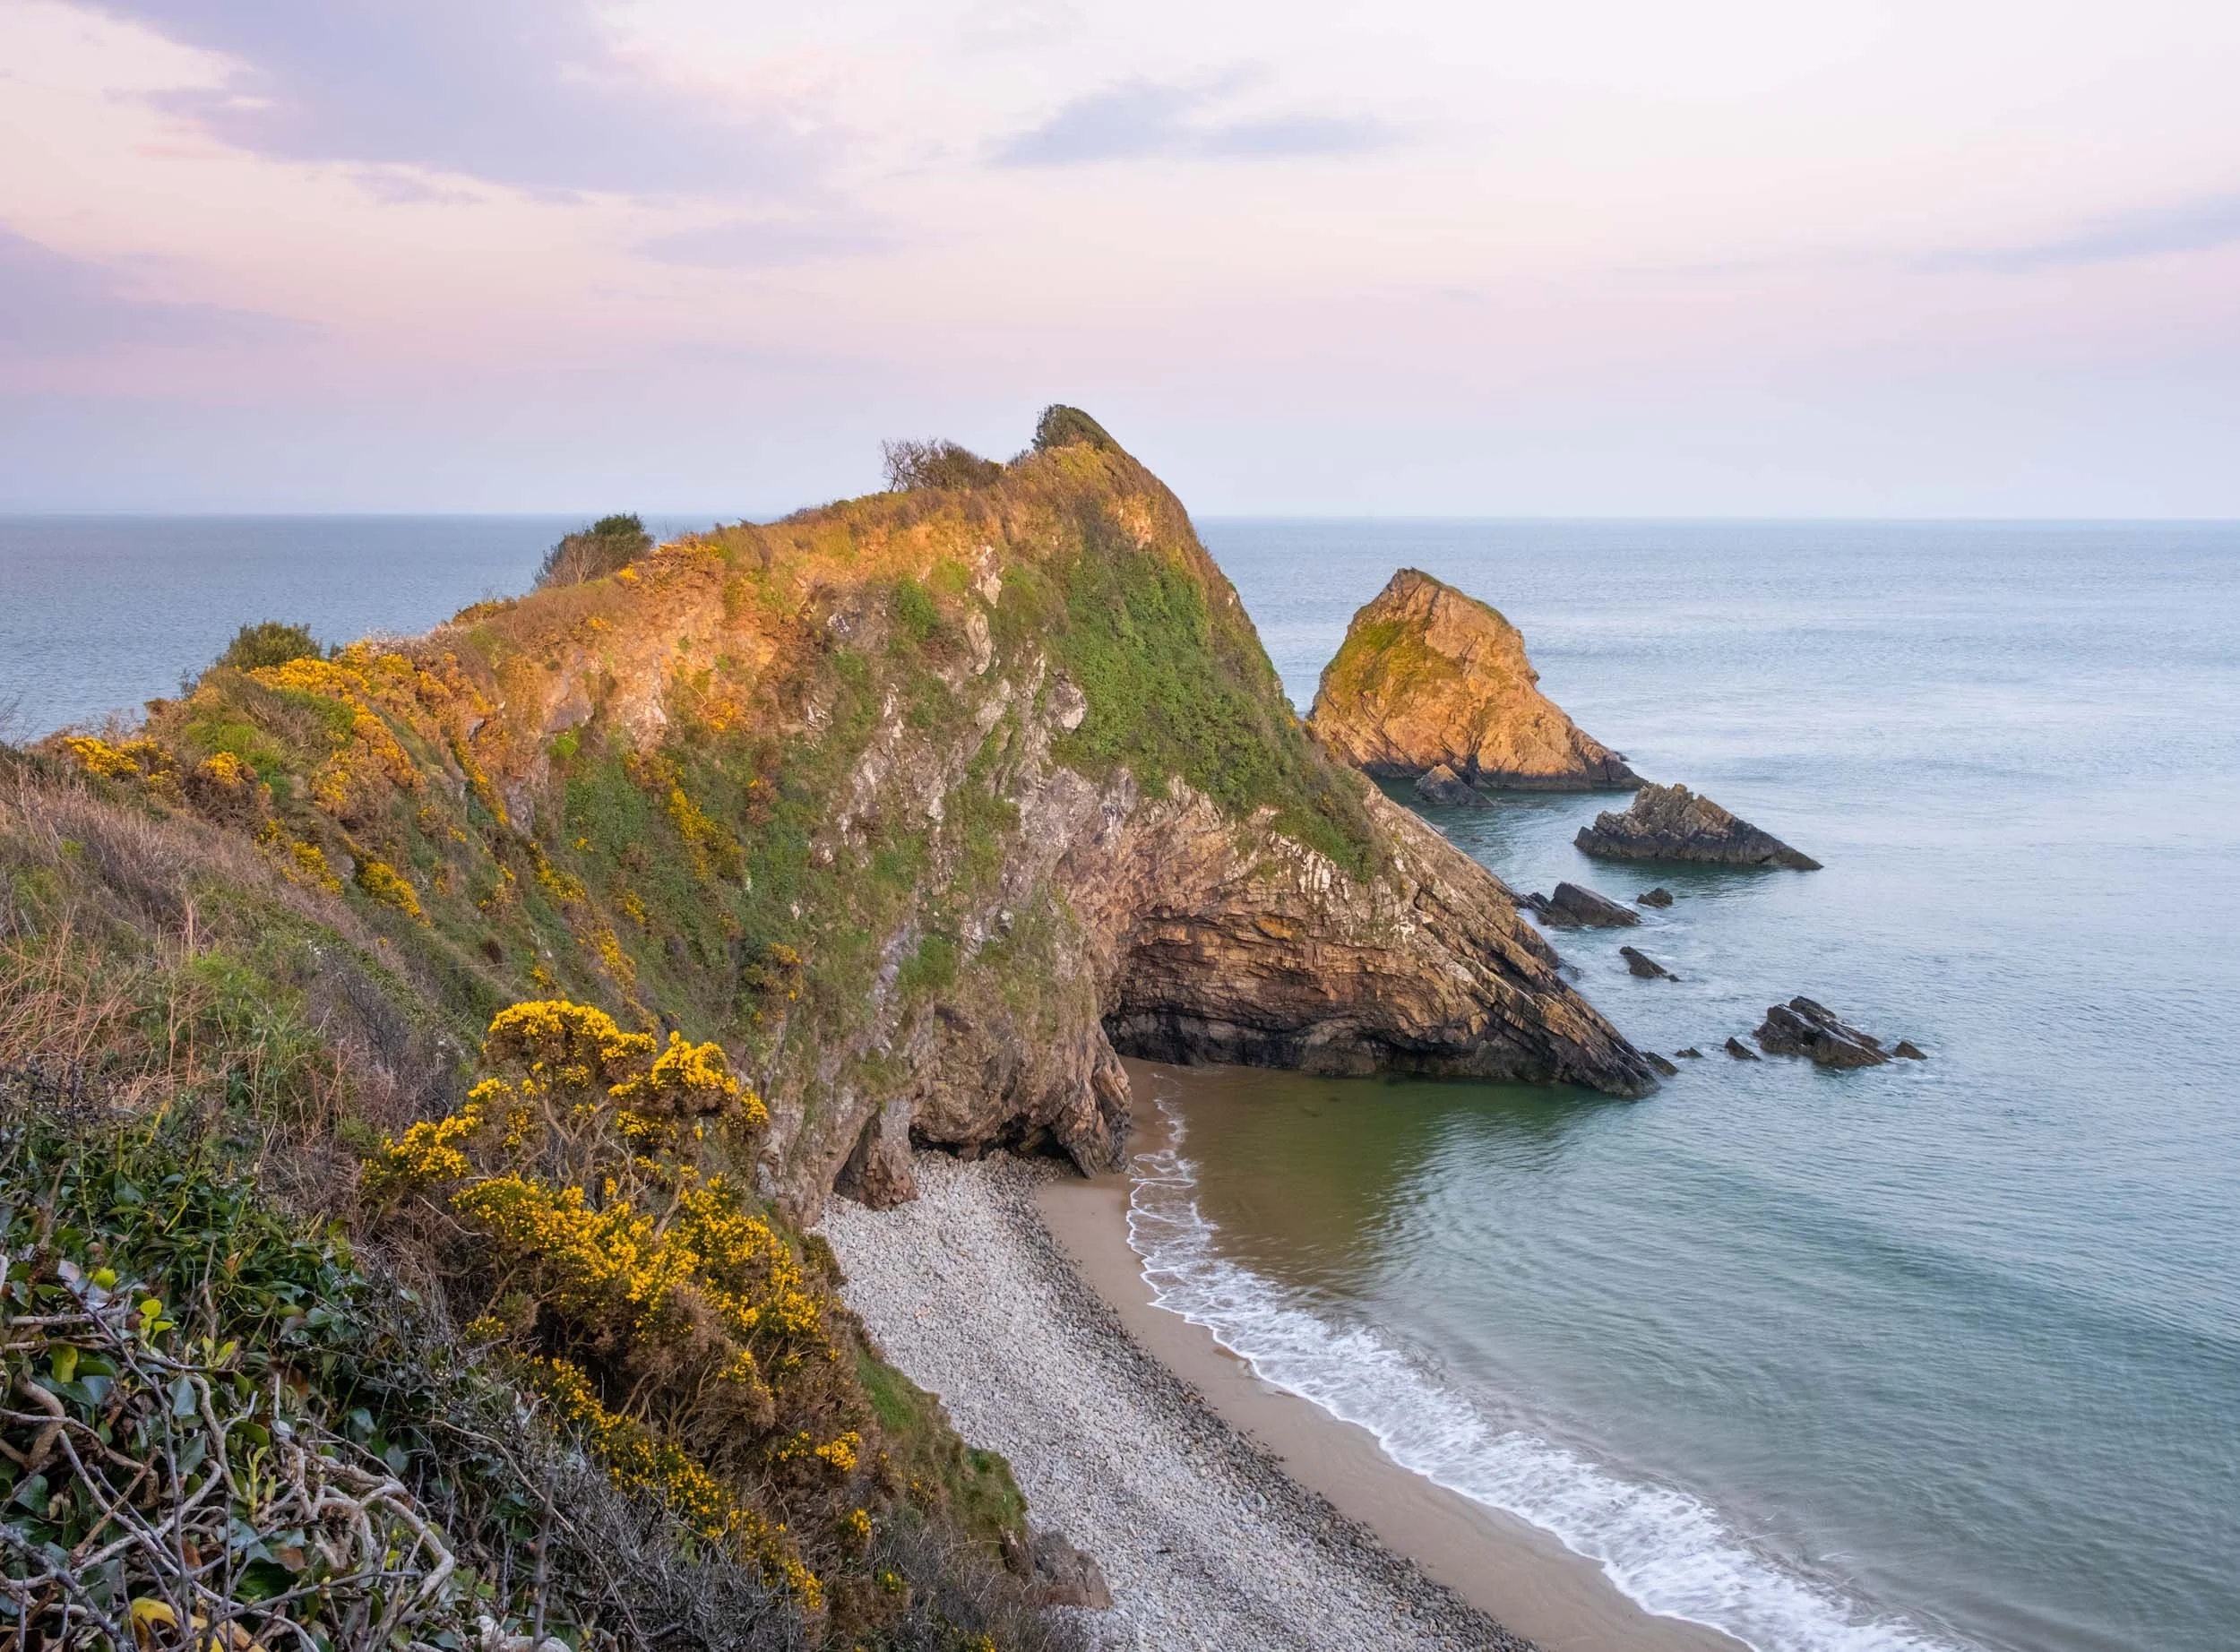
Coppet Hall and the Pull of Monkstone Point near Saundersfoot in Pembrokeshire
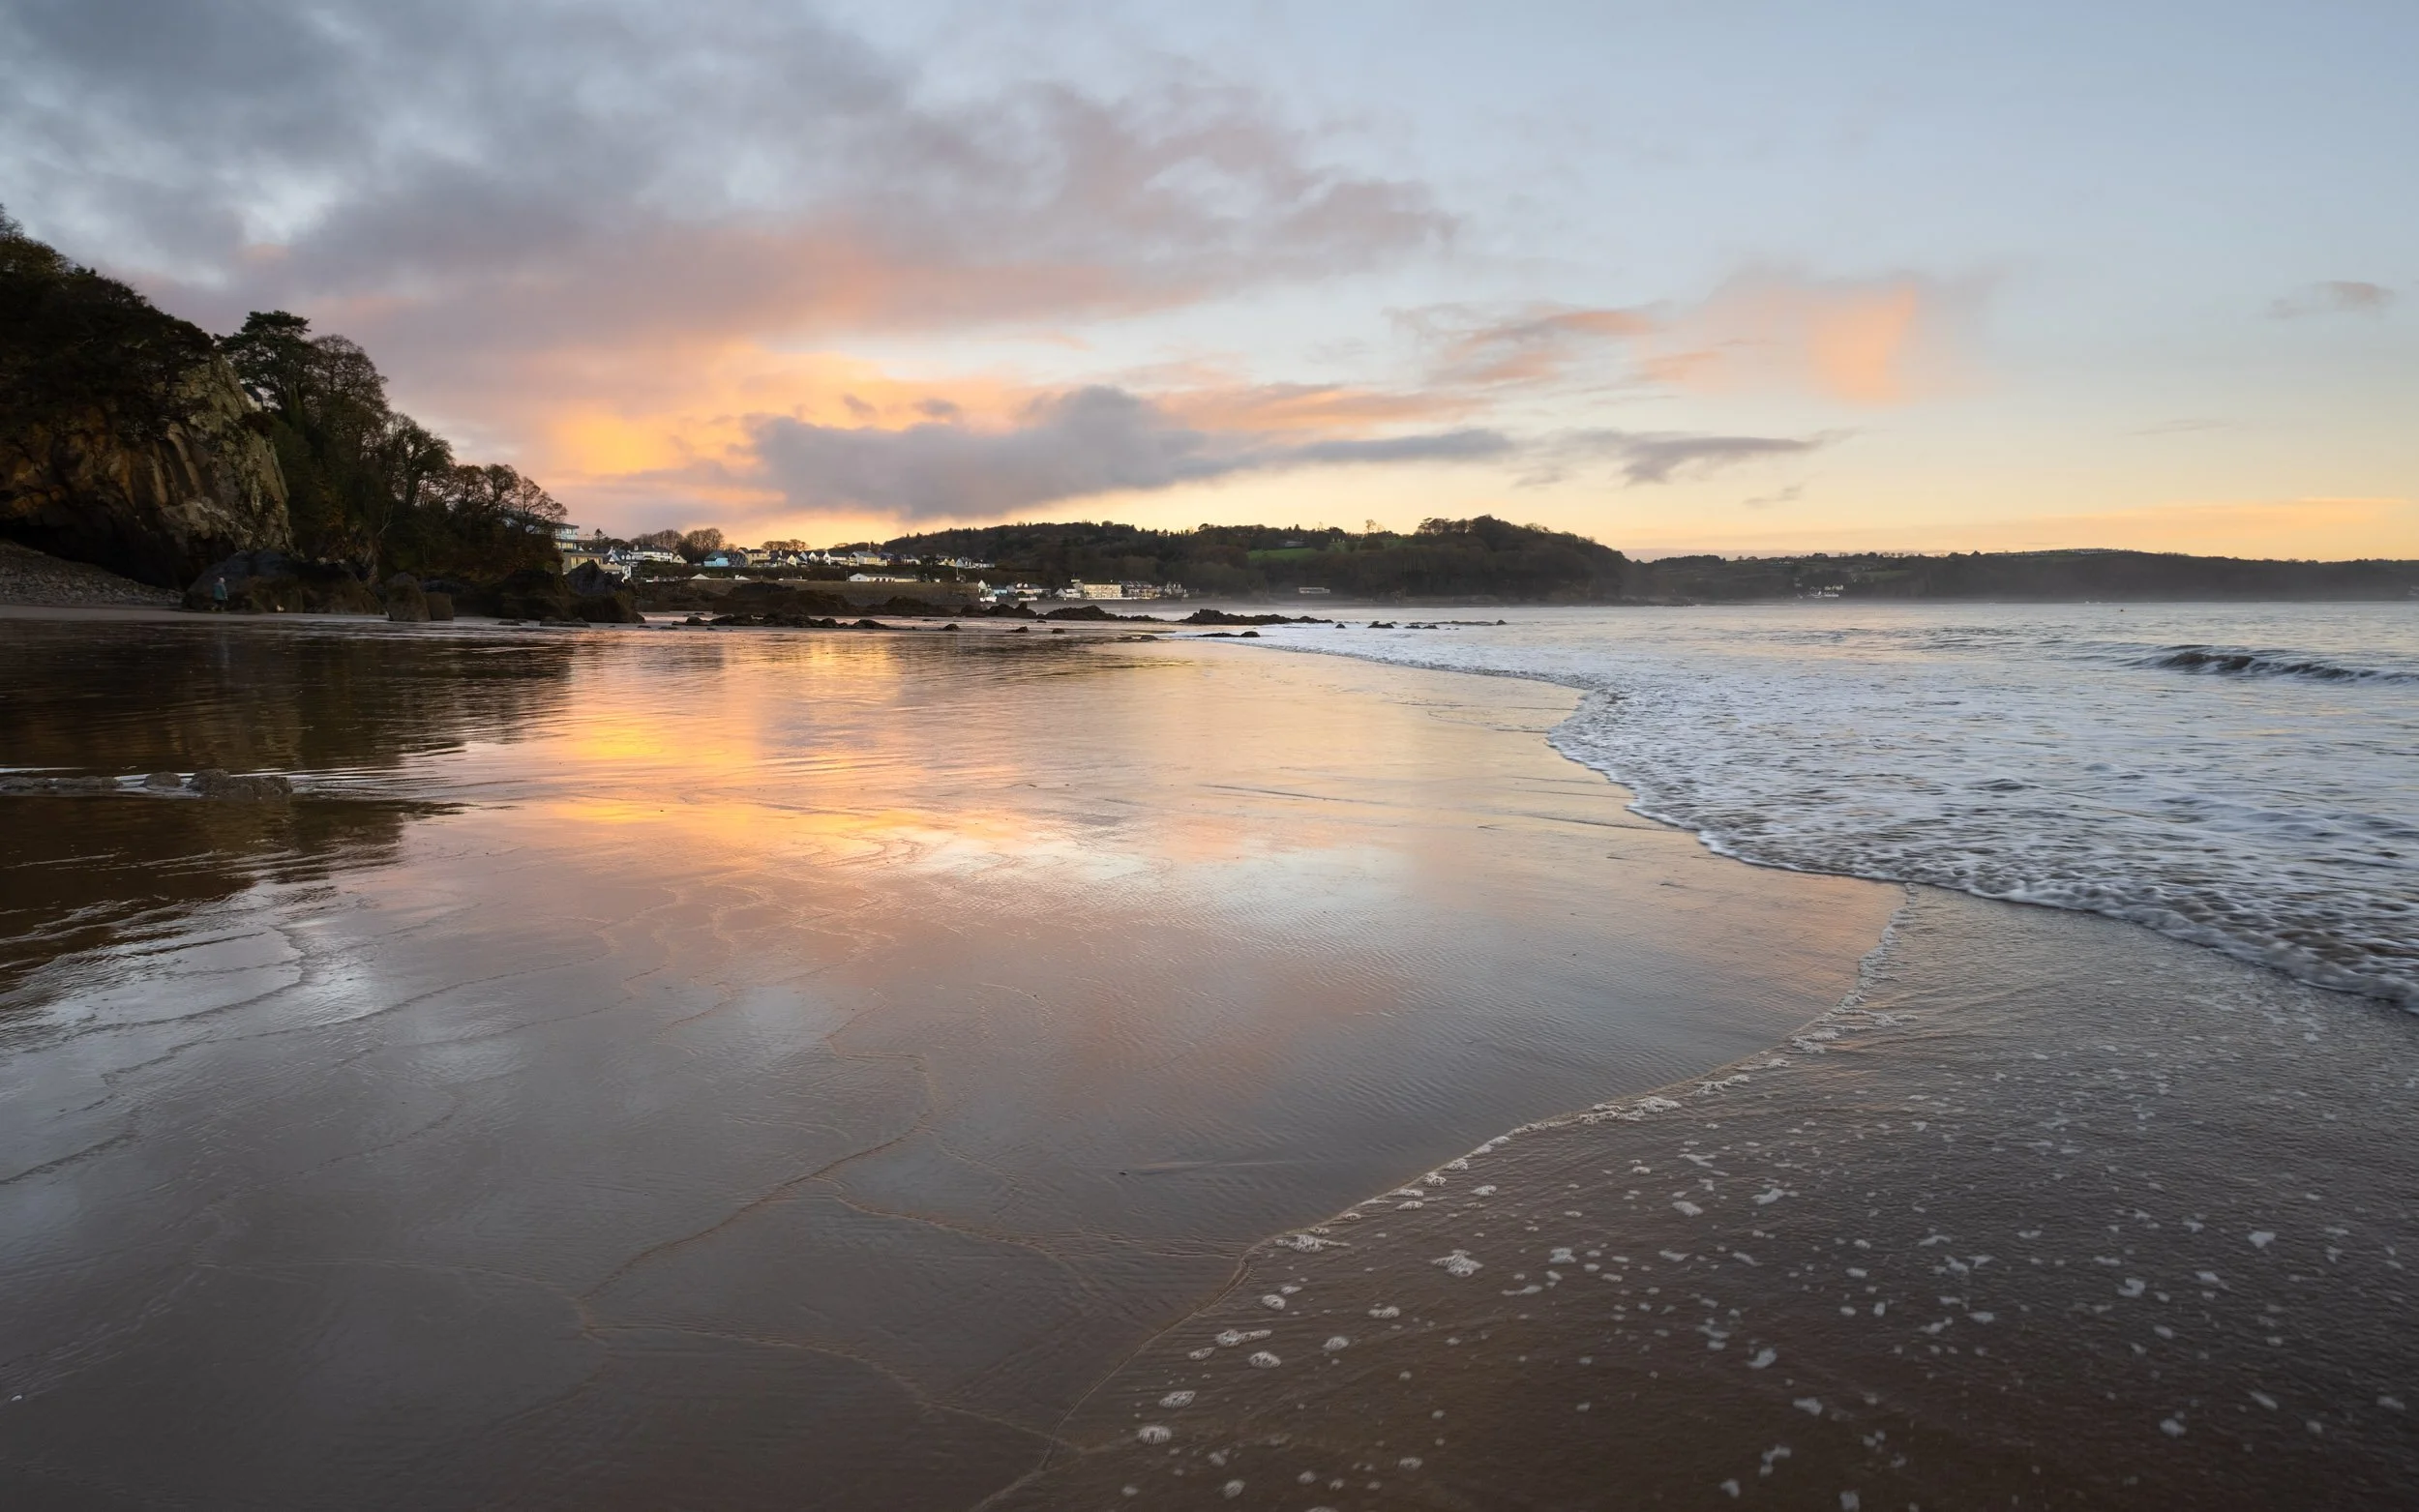
The cove next to Saundersfoot beach is called Coppet Hall. There’s a large car park here, which makes access refreshingly simple. You can step straight onto the beach and walk along the sand back towards Saundersfoot Harbour.
From this stretch, the views towards Monkstone Point opens up beautifully. At sunrise, the light can spill gently along the shoreline, catching the edges of the cliffs. In the evening, especially in winter, I’ve found there’s often a lovely sideways glow that adds depth and shape to the headland.
Winter, actually, is a bit of a secret here. The beaches tend to catch light all year round, and when the crowds thin out, there’s space to experiment. I’ve had days where the wind was biting and my tripod was half-buried in sand, but the sky cleared just enough to make it all worthwhile. Those small wins stay with you.
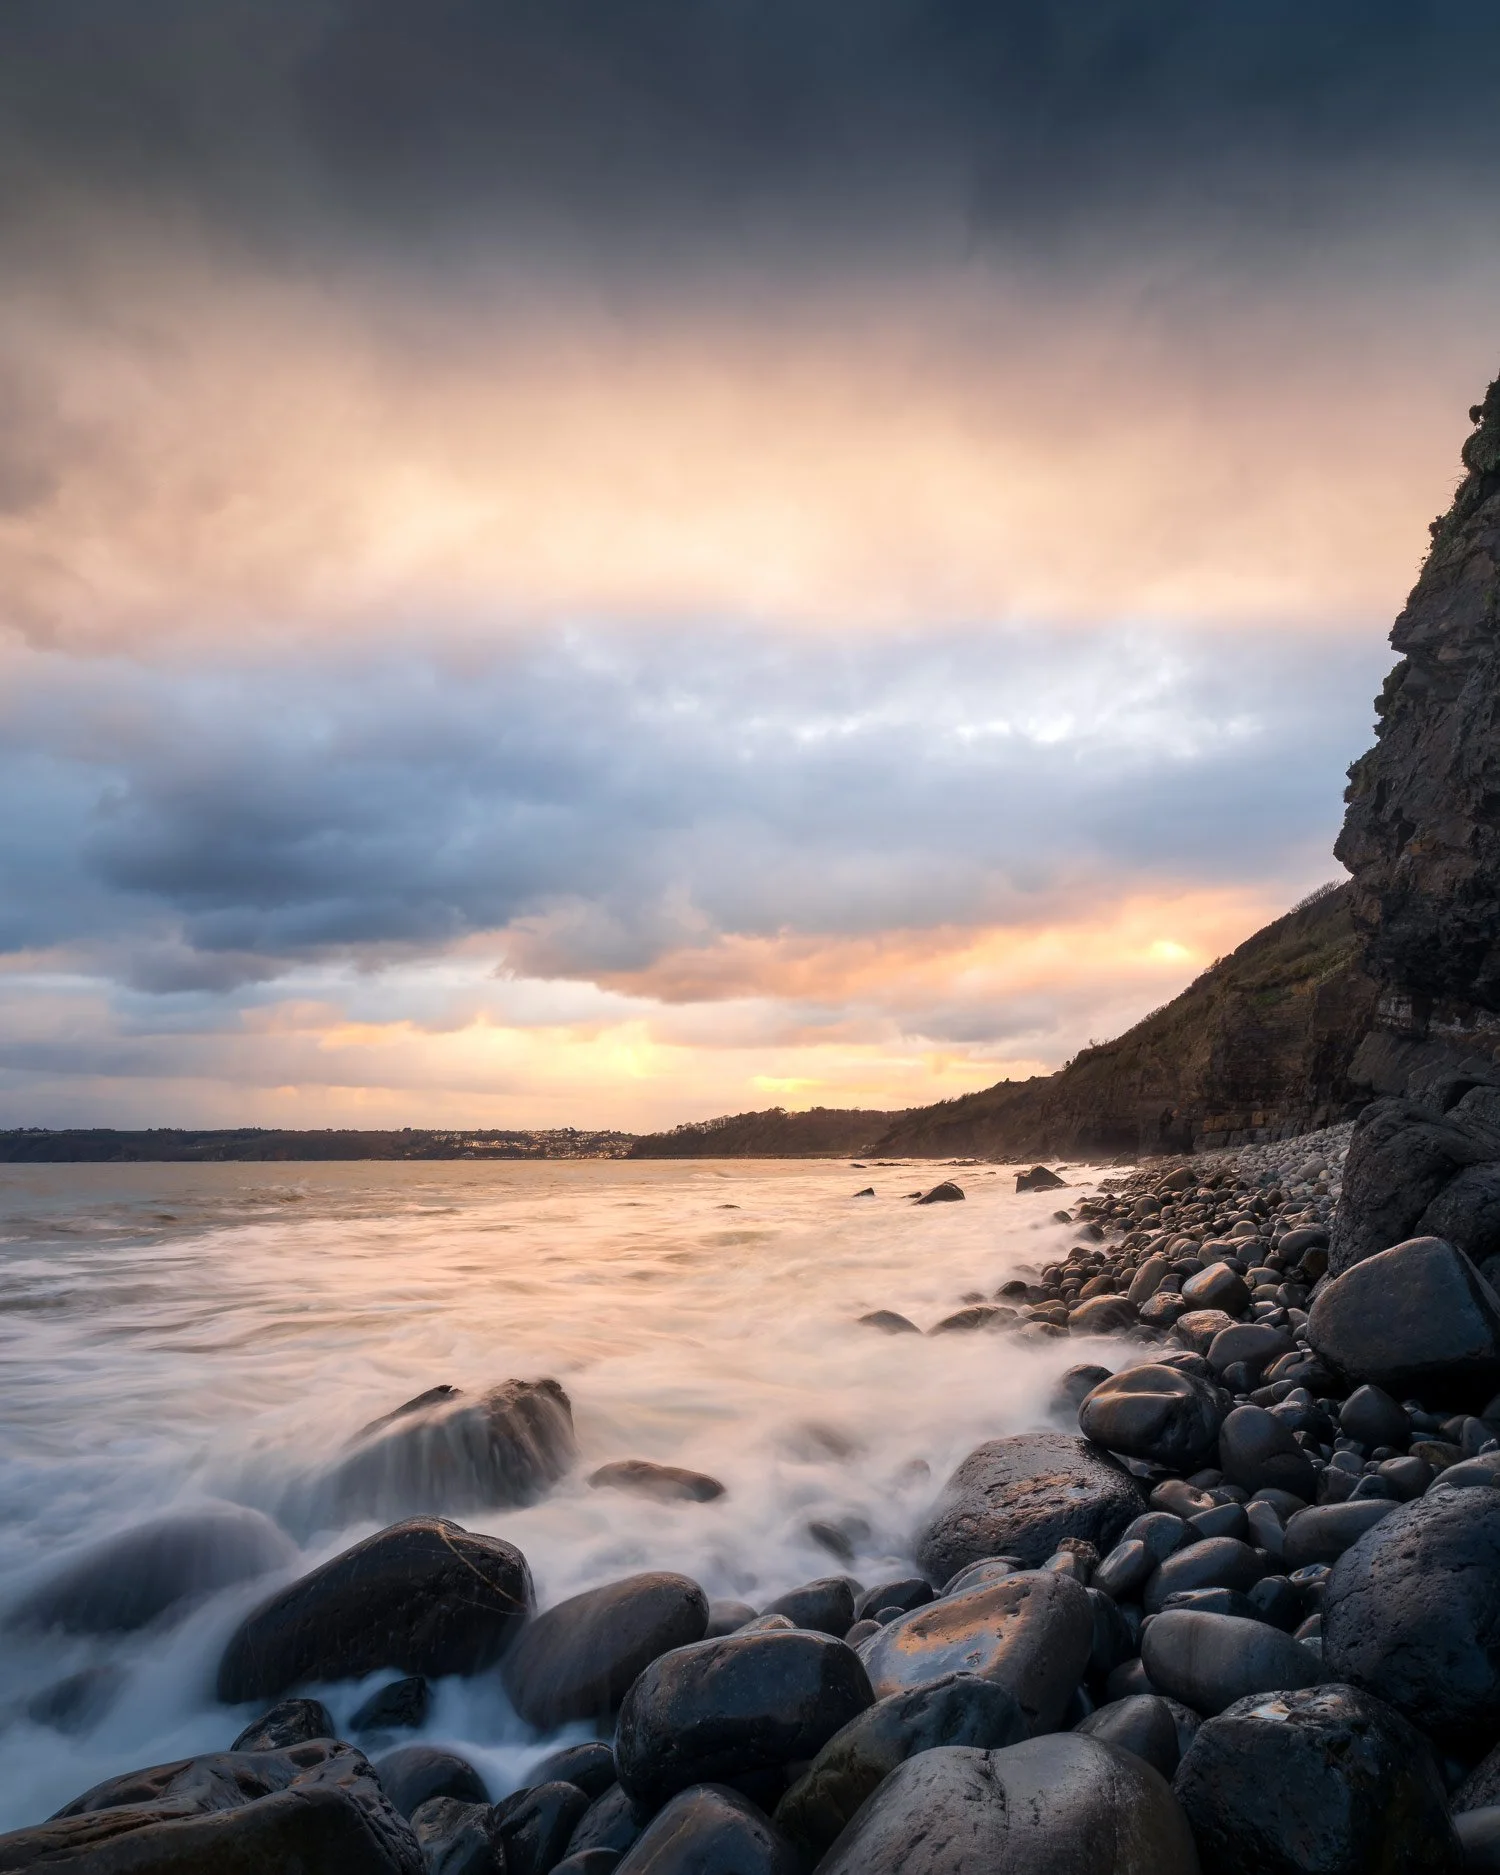
The best walk in Saundersfoot, pembrokeshire
If I had to pick a favourite route, it would be the walk from the harbour out to Monkstone Beach.
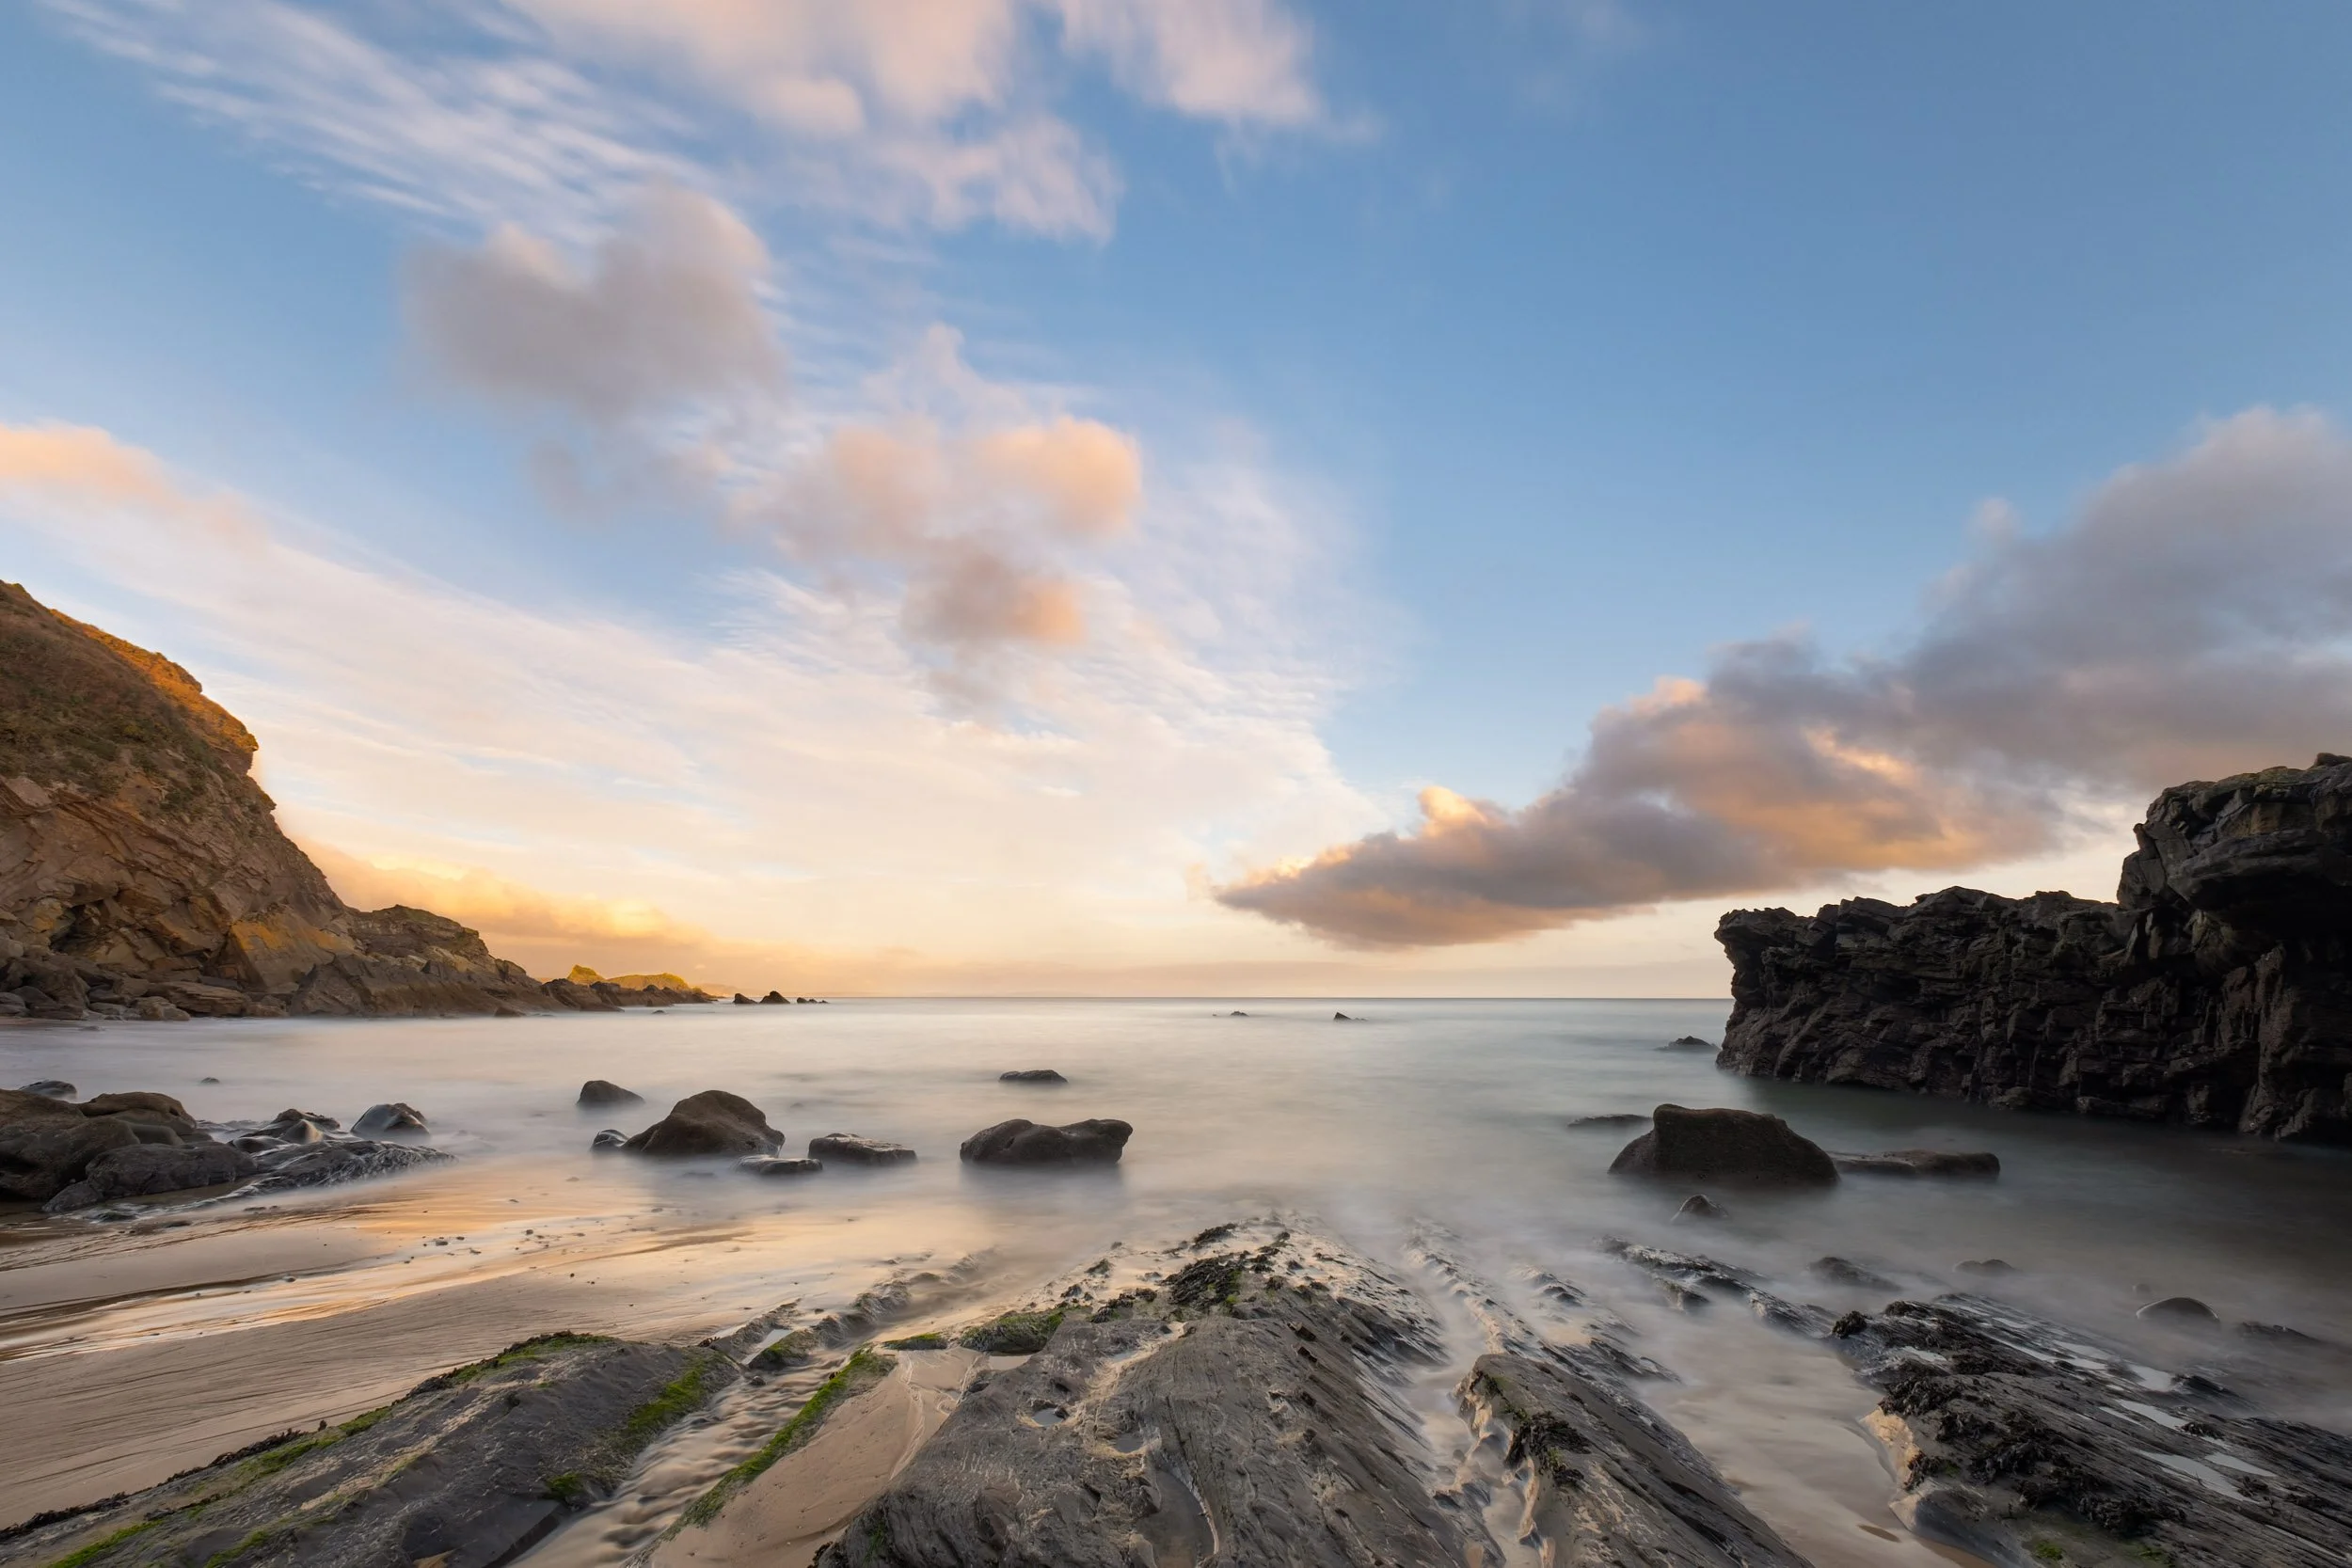
Starting at the harbour, if you follow the right-hand side round, you’ll pass a little café tucked in the corner. Just beyond it are steps down to the beach. From there, you can walk the full stretch of sand towards Monkstone Point. This section is known as Glen Beach, a run of sand and little coves where the woodland leans right down to the shore.
In spring, the fresh green canopy above the cliffs contrasts beautifully with the pale sand. In autumn, the tones soften and deepen, and the whole place feels quieter, more reflective. I love how the trees almost seem to protect the beach here, it’s not just sea and rock, but sea, rock and woodland all woven together.
When you reach Monkstone Point, you can carefully cross the rocks and drop into Monkstone Beach itself. It’s a fantastic bay, wide, open, and often surprisingly peaceful. I’ve spent entire evenings there with barely another soul in sight, just the sound of waves folding into the sand.
To make it into a circular route, there are steps up from Monkstone Beach to the coast path. From there, you can follow the path back through the woodland to Saundersfoot. It’s one of those walks that feels complete, beach, cliff, trees, harbour, all in a few unhurried hours.
A Quiet Word About the Tides
If there’s one thing I’ve learned here it’s to respect the tide.
Glen Beach is very much a low-tide walk. In Pembrokeshire, the tides can move quickly, especially on spring tides. If I’m planning to walk from Saundersfoot to Monkstone along the sand, I usually aim for a low tide when it’s starting to go out, ideally around the two-metre mark. That tends to give a comfortable window of a couple of hours.
Leave it too late, and you can find yourself watching the water creep steadily closer to the rocks behind you. I’ve had one occasion where I misjudged it and ended up quickening my pace far more than I’d planned. It’s not dangerous if you stay aware, and there are exit points up to the coastal path if needed, but it’s definitely a place where a bit of planning makes the day far more enjoyable.
There’s something grounding about working with the tide rather than against it. It forces you to slow down, to check the charts, to think ahead. In a way, it’s part of the rhythm of photography in Saundersfoot.

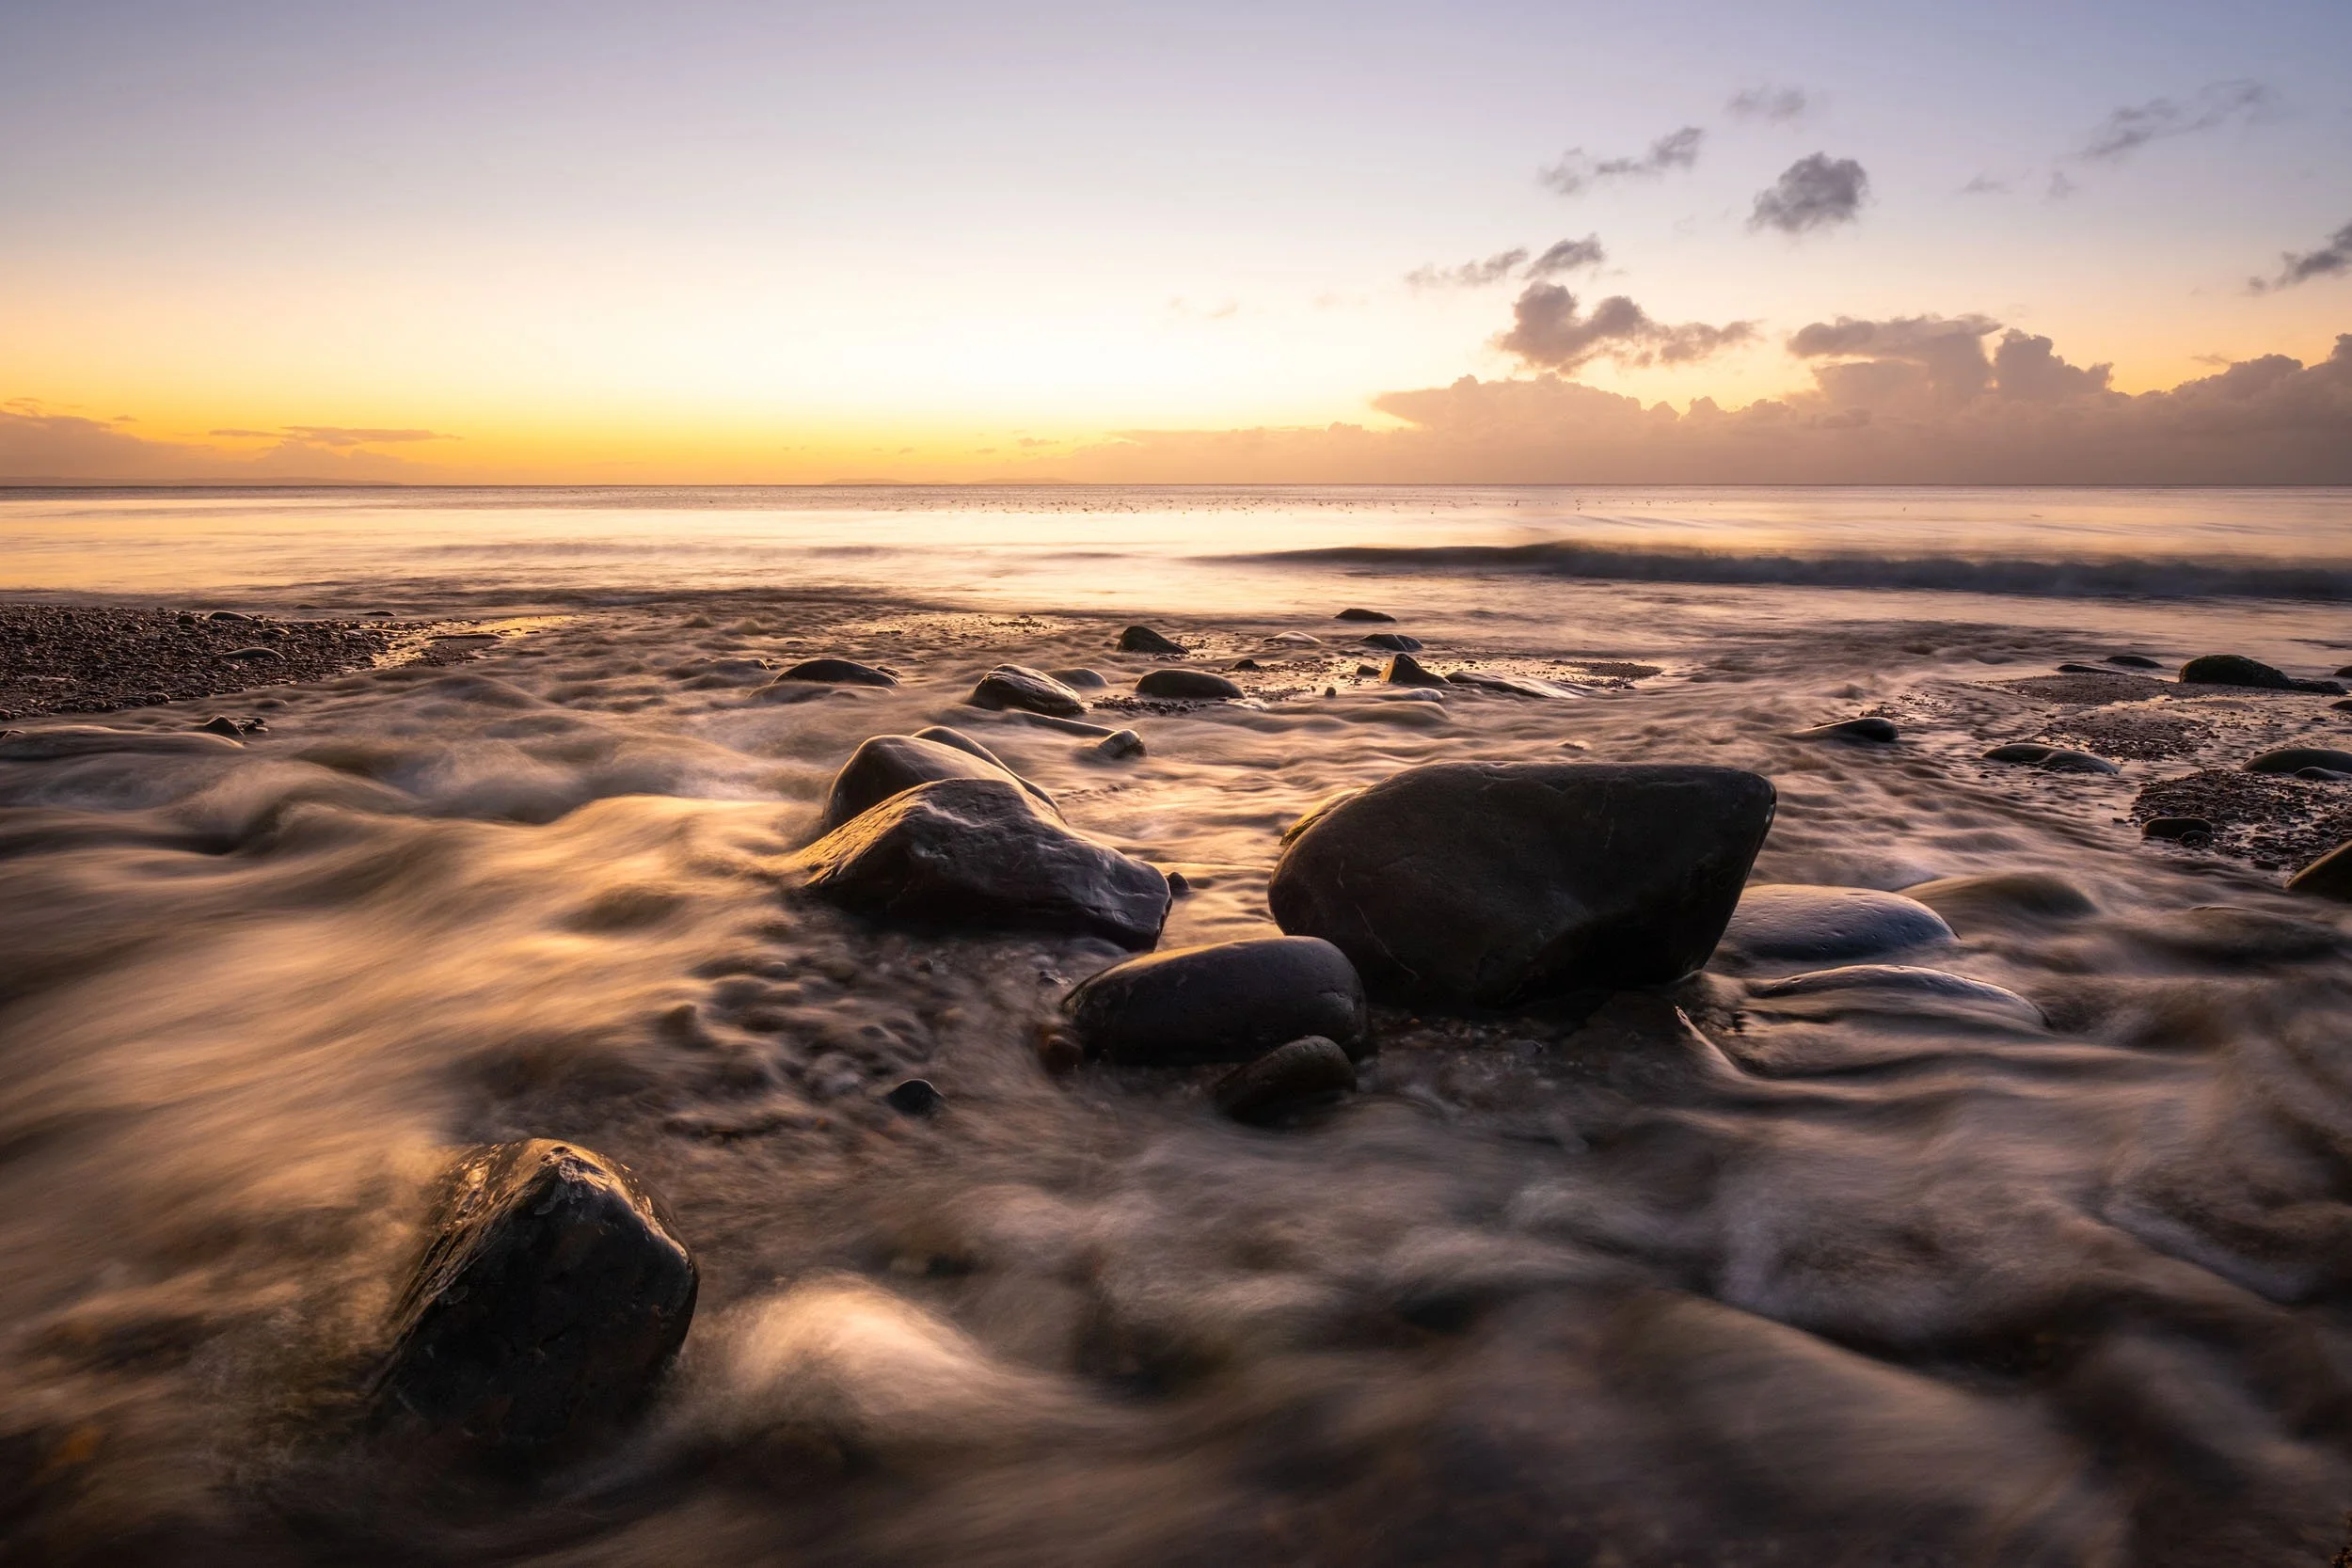
Saundersfoot Harbour and the Bigger Picture
Saundersfoot Harbour itself is worth time with a camera too. Boats shifting with the tide, reflections in the calmer water, textures in the harbour wall, especially after rain when everything darkens and deepens in tone.
And beyond photography, Saundersfoot works simply because it’s easy to live in for a few days. You can head out early for sunrise, come back for breakfast in a café, wander out again in a softer afternoon light. It’s a comfortable base to explore this stretch of south Pembrokeshire, with places like Tenby and Pendine within easy reach.
Is Saundersfoot beach a safe place to swim?
One thing I can’t ignore, though, is water quality. It’s become a hot topic along this coastline. While Saundersfoot beach is often awarded Blue Flag status, prolonged wet spells can lead to sewage overflows affecting the bay, and that’s true not just here but along much of the UK coastline, particularly near towns. If I’m tempted by a swim or surf after a photography shoot, I tend to check the Surfers Against Sewage website or the “Safer Seas & Rivers” app first. It gives real-time alerts, which feels like a sensible habit these days. I must stress this isn't just Saundersfoot, this is true for almost every coastal town in the UK i’m sorry to say.
Why I Keep Coming Back
What I love most about Saundersfoot is that it doesn’t demand perfect conditions for photography. It works in soft light, in moody skies, in the quieter months of winter. It rewards patience more than drama.
It’s a place for wandering rather than ticking off compositions. For noticing how the woodland meets the sand. For keeping half an eye on the tide and the other on the shifting light, the oyster catchers are always a worthwhile subject if you have a long lens in your bag.
And perhaps that’s why I return. Not because it’s spectacular in a showy way, although sometimes it is, but because it feels honest. The kind of coastline that lets you slow down and just be present with your camera.
You might find, as I often do, that the best photographs come quietly, somewhere between harbour and headland, with sand in your boots and no real plan at all.
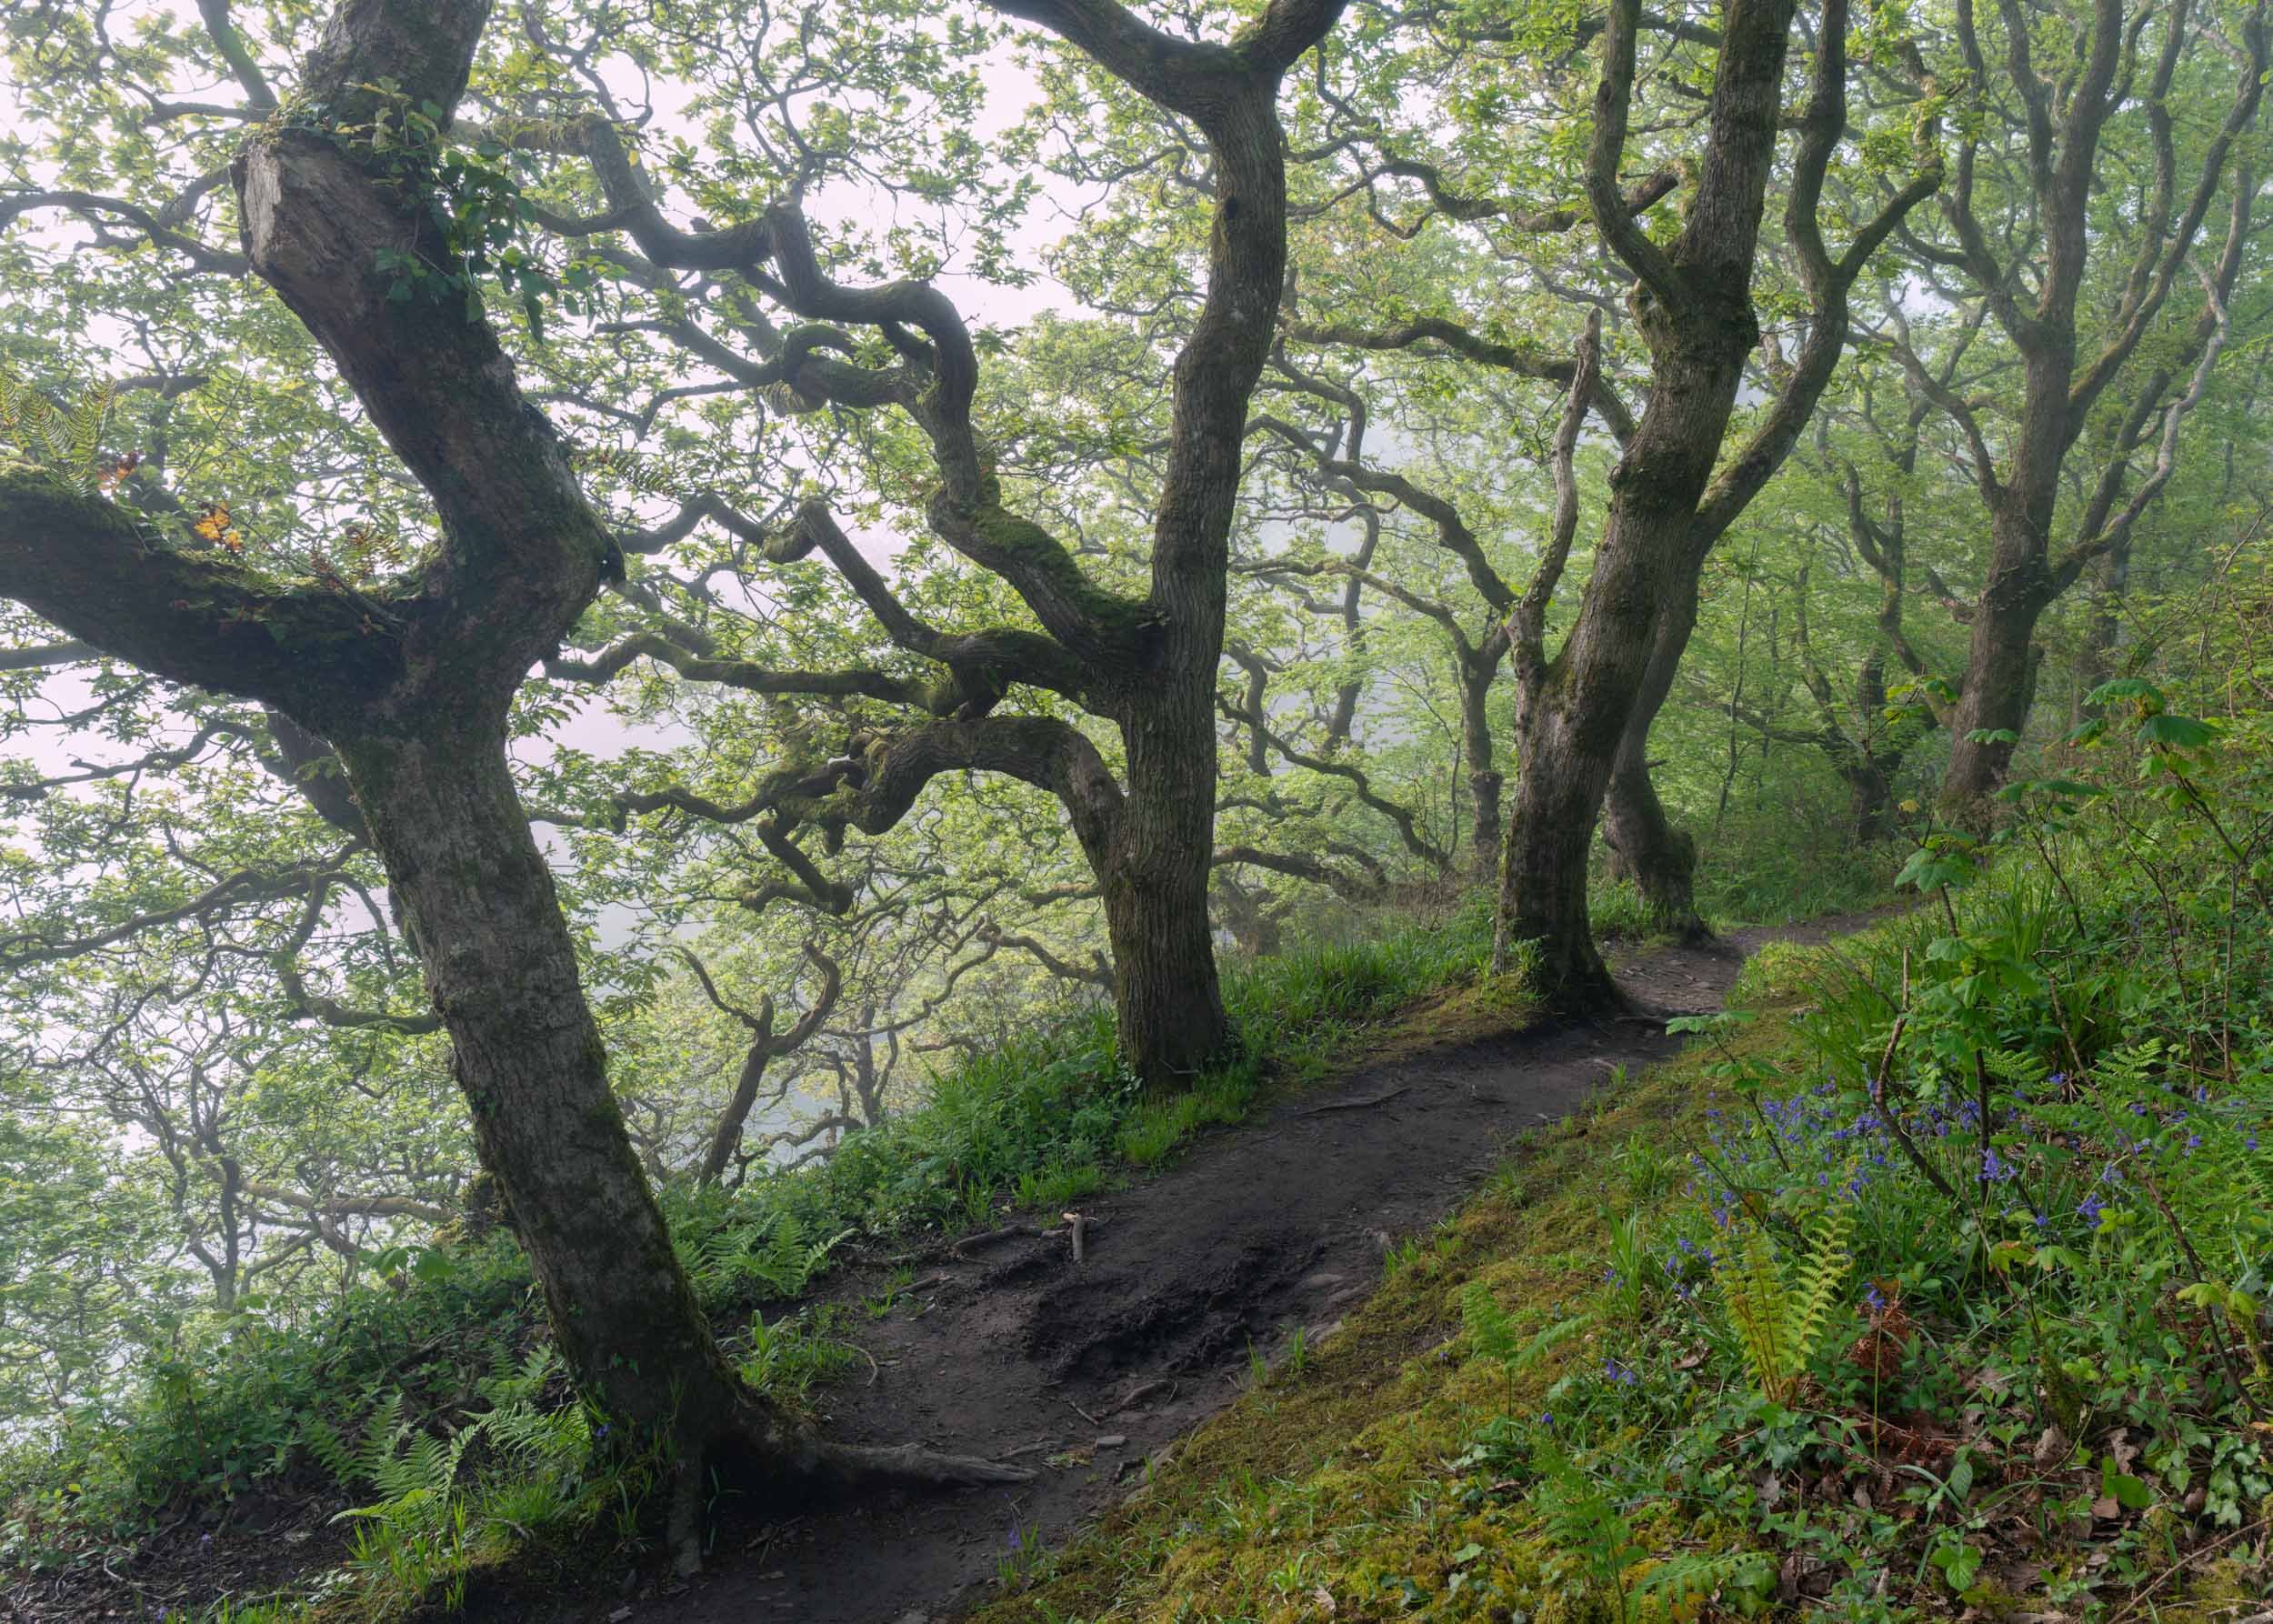
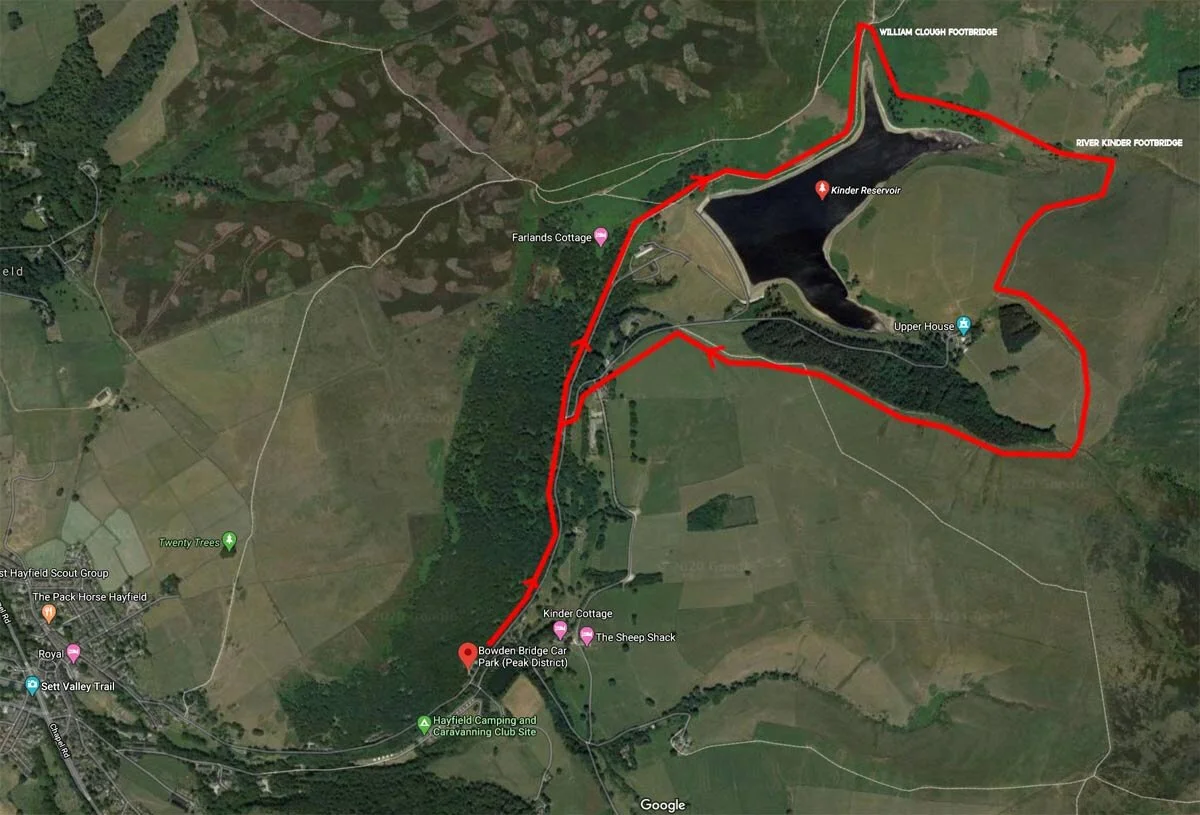
The coastal path from Saundersfoot to Monkstone point, Pembrokeshire